skip to main |
skip to sidebar

 I love Designer Series Paper from Stampin' Up!® Each pack contains 2 each of 6 different double sided papers. I am a matchy-matchy girl and I love that all the papers co-ordinate with each other. However, in each pack there are always some designs that I love more than others and a couple that do not inspire me at all. This technique works great with those papers that you set aside because, well, they were challenging. This paper was from the Beyond the Garden DSP paper in the Summer Mini catalog and I just wasn't feeling the love, know what I mean? So I decided to experiment with a double embossing technique suggested in Stampin' Success, a magazine for Stampin' Up! demos.
I first brayed Versamark® on the recessed or smooth side of the Finial Press embossing folder, then I placed the DSP paper face down on the brayed side of the EF and ran it through my Big Shot®. I covered the entire paper with white embossing powder and heat embossed. I embossed the flowers also and sponged on Rose Red, Pink Pirouette and Tangerine Tango.
So get out that less than desirable paper and start embossing!
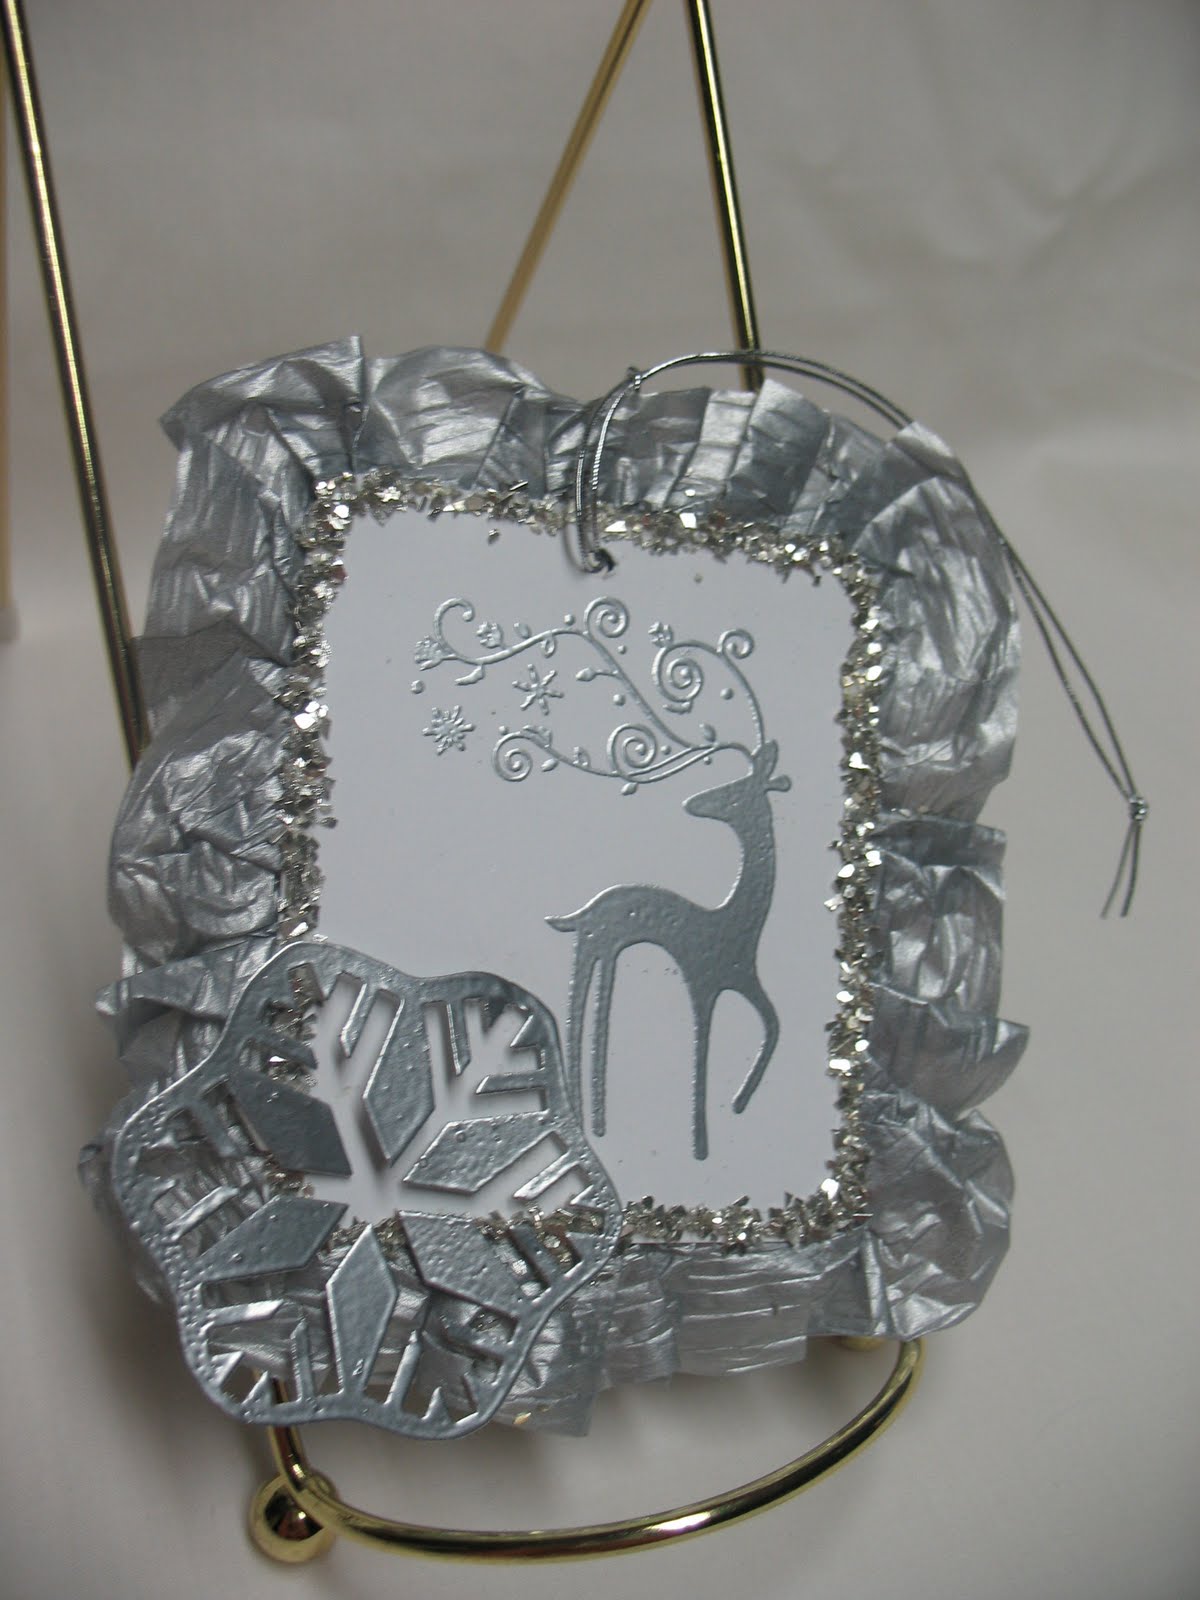
 Look it's Dasher, Dancer, Prancer, Vixen, Comet Cupid, Donder and Blitzen. Donder??? Is that correct? This little gem of a stamp is called Dasher but you could add a little red nose and call him Rudolph; he won't mind!
Dasher was stamped with Versamark™ and embossed with silver embossing powder. I added some of that lovely waffle paper and of course some of the new silver glass glitter found in the Holiday mini. 
(only $3.95 a jar!)
The snowflake is the negative image from the Snowflake Punch that I simply cut around and embossed with silver embossing powder. It is actually a piece of Whisper White.
Now originally I did not plan to add the snowflake but I smeared glue on the front of my tag so the snowflake was strategically placed to hide it. I did not take a photo of the back but there is a piece of Basic Gray card stock glued on the back with "to & from" stamped. This is one of the Christmas tags we will be making on Friday!! See what you are missing???????
I believe this technique is called emerging color. It is very easy to do. Simply stamp any design (I used the Medallion stamp) with Versamark™ on a piece of DSP and emboss with clear embossing powder. Then brayer a dark color of ink (I used Elegant Eggplant) over the entire paper. Wipe off the excess ink on the embossed image and TaDa! Instead of using DSP you could stamp, sponge, swipe ink on a piece of paper to make a background piece and emboss an image over that. Just make sure your background piece is completely dry before you emboss or embossing powder will stick everywhere (yes I know this from experience!). 

 This card is a humble attempt to CASE a card by Michelle Zindorf. Here is her card. I absolutely love the cards made by Michelle Zindorf. Her blog is wonderful and she has step by step instructions for recreating her stunning cards. Her cards are like works of art! She does lots of embossing, brayering and sponging.
I must say that my first 2 attempts making this card were total flops!! (And both went flying across the basement floor!) I kept adding embossing powder before the background was dry. Michelle's card was brayered with Apricot Appeal in the background; instead I cheated a little and started with Apricot Appeal paper. First I stamped the tree from Lovely as a Tree with Versamark and embossed with black EP. I then stamped the Medallion with Versamark and embossed with clear EP. I sponged Pumpkin Pie ink in the middle and around the edge of the embossed Medallion and at the bottom of the panel. Taken with Teal was sponged around the top of the panel and about 3/4 of the way down the sides; Chocolate Chip was sponged at the bottom. As you can see I forgot to mask off the bottom of the card so my ground would be more distinct but. . .this was my third attempt. I have to add that I love the Medallion stamp! Believe it or not I this is my first Big background stamp! Yes, it is true I am background stamp challenged! But, maybe there is hope for me yet because I do love this stamp! 
 This has one of my new favorite color combos, Always Artichoke and Rich Razzleberry. I had to purchase a new heat gun because apparently the old one was not getting hot enough. It took me several weeks of frustration before I realized it was my heat gun and not the embossing powder. I always thought if your heat gun went out it would simply not turn on or not get hot at all but sometimes it doesn't get hot enough. I mean how can you check it? Stick your hand in front of it?? I think not!! So if you are having trouble with all of your embossing powder melting well it could be your heat gun and you will need to purchase a new one (from me preferably!)
The Daisies were stamped with Versamark and embossed in black; then I brayered So Saffron at the top, Always Artichoke at the botton and sponged Rich Razzleberry around the top edge of the So Saffron. The ribbon is the new Polka Dot grosgrain that is solid on one side.
I am having stamping withdrawals! I helped with VBS crafts at my church last week and had very little time to play. My stamping area is a disaster so I guess I should straighten it first so I can find my table-Ugh! I want a magic clean-up wand!!!

 This card is made with the SU stamp set called Fifth Avenue Floral. The funny thing about stamp sets, sometimes I see a set and I can hardly wait to get it!! Then I get it, use it once or twice and forget about it. Other times I buy a set simply because it is on sale or in a demo pre-order and use it over and over again. Then sometimes I just pass by a set completely until I see all the beautiful things someone else makes with it. This was a set that I simply ignored until I saw all the wonderful cards everyone else was creating.
For this card I embosed the rose 3 times with white EP and simply trimmed 2 of the flowers and layered them on the bottom image using Dimensionals. It is hard to see
 in the photo but the white has been run through the Big Shot with a Texturz plate. I love all of SU colors but their reds are fabulous!! This is Riding Hood Red that will be retiring. I like the darker red in this paper, although Ruby Red is a good substitute. SU Real Red paper is a very true red, not too orange or too pink. Even before I was such a fan of SU or a demo I would always stay stocked on Real Red paper!!
I think I should have added a little glitter to this, maybe some dazzling diamonds?

 This card uses a technique found in the Stampin' Success magazine for SU demos-embossing on Designer Series Paper. I don't know why but I hardly ever think of stamping or embossing DSP. The Upsy Daisy stamp was first stamped using white craft ink and then embossed with white EP. I used my new Eyelet Border punch on a strip of Kiwi Kiss and Whisper White and layered them on top of the DSP. The sentiment was stamped with white craft ink and is from Oval All, a stamp set from the Occasions mini. It was punched with the new Scallop Oval punch. The card base is Rose Red. I am going to miss Kiwi Kiss!! I think it was my favorite In-Color this year.
I am still impatiently waiting on my pre-order of new goodies and my new catalog. I keep checking but . . .
 I did not make a St. Patty's Day card but thought I would post a card that had green in it. I do not want my blog to get pinched!
I copied this card from someone, somewhere but I did not save a copy of the original so if it is yours let me know and I will give you credit.
These flowers & leaves are from the stamp set Petal Pizazz. I stamped them in versamark and embossed them with Iridescent Ice. The sentiment is from a hostess set and the definition stamp is from Bloomin' Beautiful. Paper colors are Tangerine Tango, Summer Sun, Pink Pirouette, Garden Green and the Whisper White Top Note is layered on Baja Breeze!
I love sparkles! and glitter! and rhinestones! Now that I see this card on the "Big Screen" I like it even better. I think I am going to make another with different colors.


.jpg)


 I love Designer Series Paper from Stampin' Up!® Each pack contains 2 each of 6 different double sided papers. I am a matchy-matchy girl and I love that all the papers co-ordinate with each other. However, in each pack there are always some designs that I love more than others and a couple that do not inspire me at all. This technique works great with those papers that you set aside because, well, they were challenging. This paper was from the Beyond the Garden DSP paper in the Summer Mini catalog and I just wasn't feeling the love, know what I mean? So I decided to experiment with a double embossing technique suggested in Stampin' Success, a magazine for Stampin' Up! demos.